The algorithm can be frustrating for sure, but creating a cohesive feed has helped me increase my followers and my engagement rate drastically.
Here is my Instagram transformation, and the steps I took to grow my account.
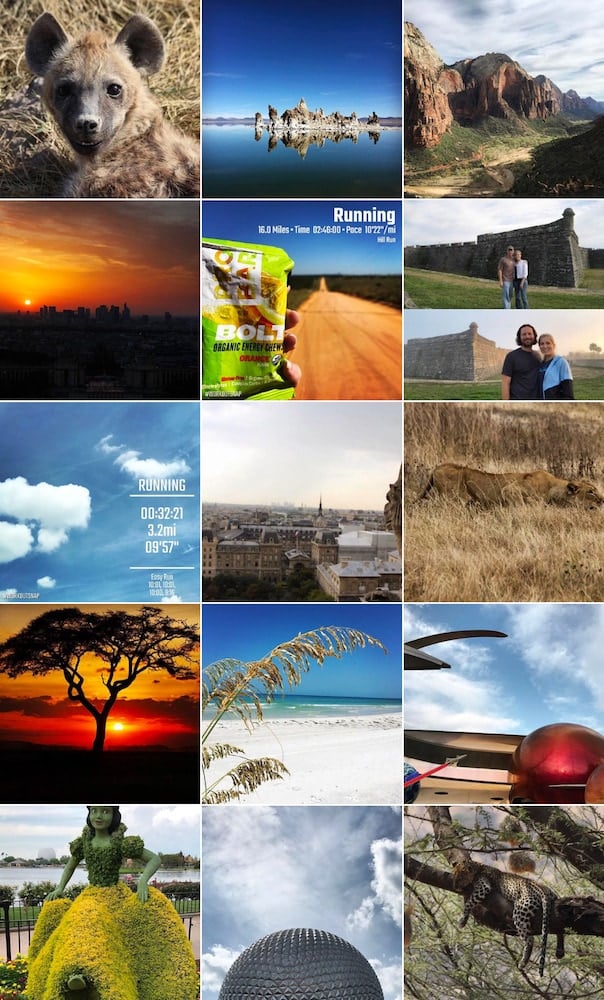
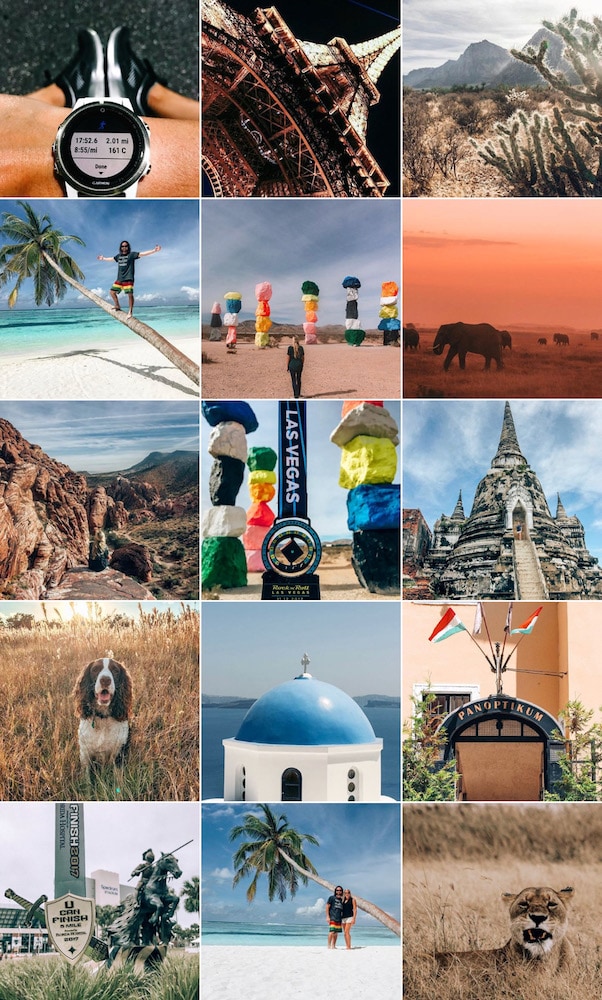
Before Preview App
I started my page in February of 2017 by converting my personal page with 200 followers to my page to support my travel blog.
I grew quickly at first and then it dropped off. This pattern of growth and stagnation continued for the next few months.
My engagement was all over the place, even with using hashtags and geotags (anywhere from 150 – 500 when I had 3000 – 4000 followers).
My comments were almost nonexistent (usually 5 – 15 with 30 – 40 on a good post including my replies).
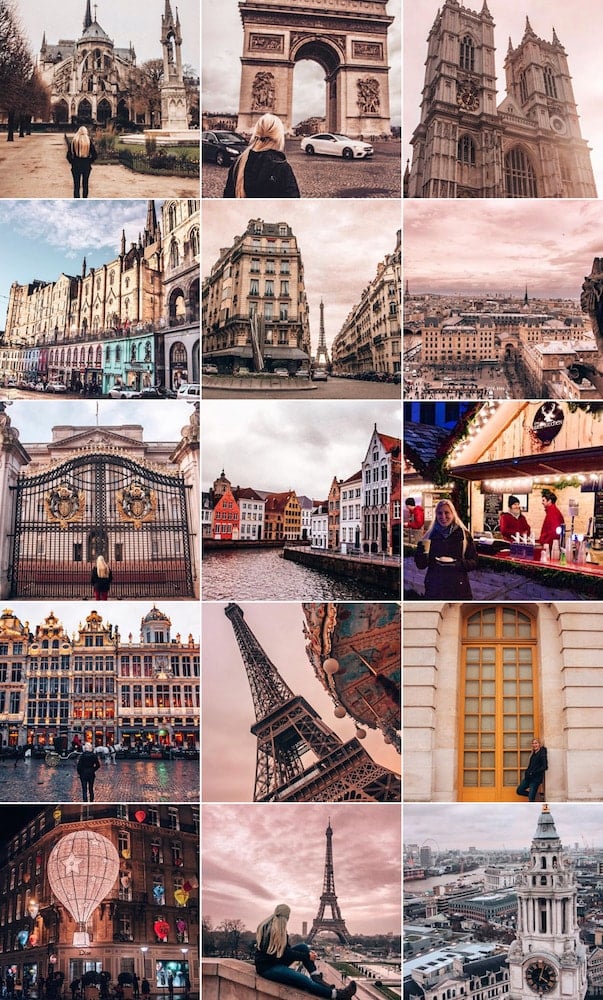
Before Preview App and Lightroom:
In October of 2017, I decided to start editing my photos with Lightroom and purchased some presets to help me.
Previously I had thought that my photos were just fine on their own. I didn’t think I needed to edit anything or use anything other than Instagram filters. I realized quickly how much my photos improved with color correction. Others noticed as well as I experienced fresh growth.
I quickly jumped from 4,000 followers to 5,500 followers by December of 2018. My photos were regularly receiving about 10% engagement with likes and comments combined.
After Lightroom and before Preview app:
Finding Preview App
With the new year came New Year’s resolutions. I wanted to focus on growing my following and my engagement.
I found Helene Sula (@heleneinbetween) on Instagram and signed up for her Instagram for Success course, something I highly recommend for anyone wanting to grow. In the course, she went through the tools she used, and one of them was Preview App.
Before I found Preview App, the most I did with feed planning was to quickly post a photo, screenshot my feed with it, and then delete it. Terrible, right? I might repeat this three or four times to decide which photo to post. It was frustrating at best.
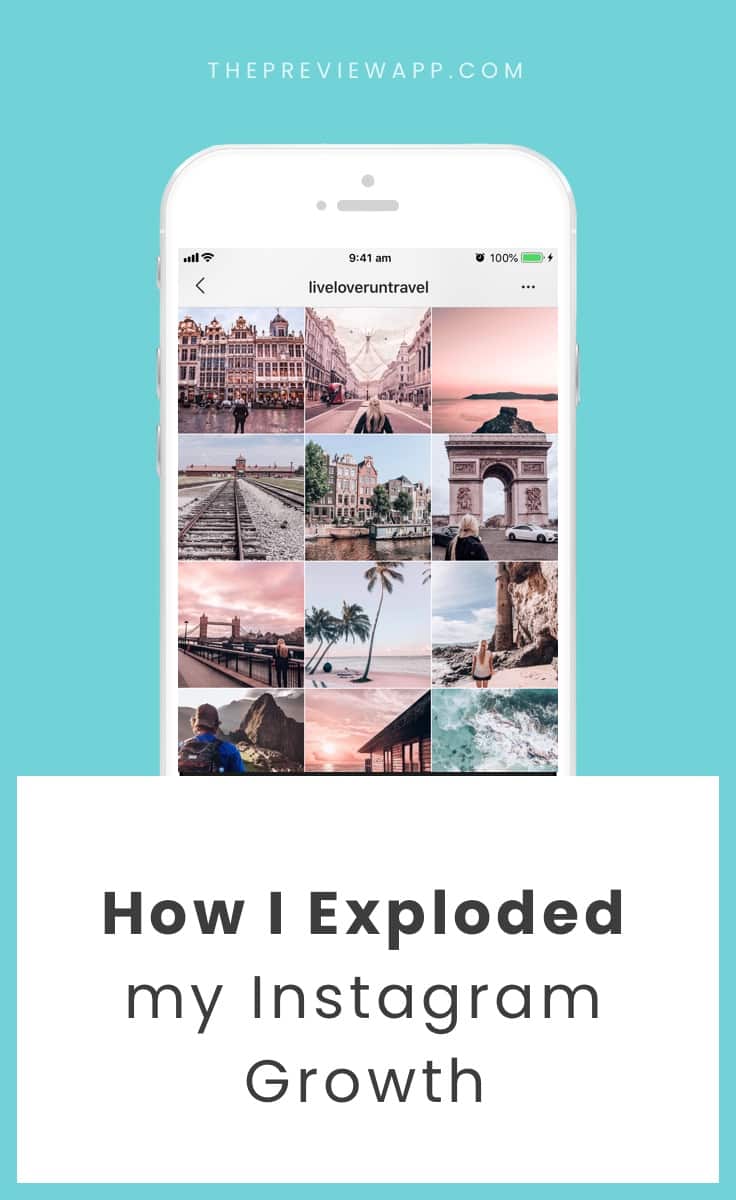
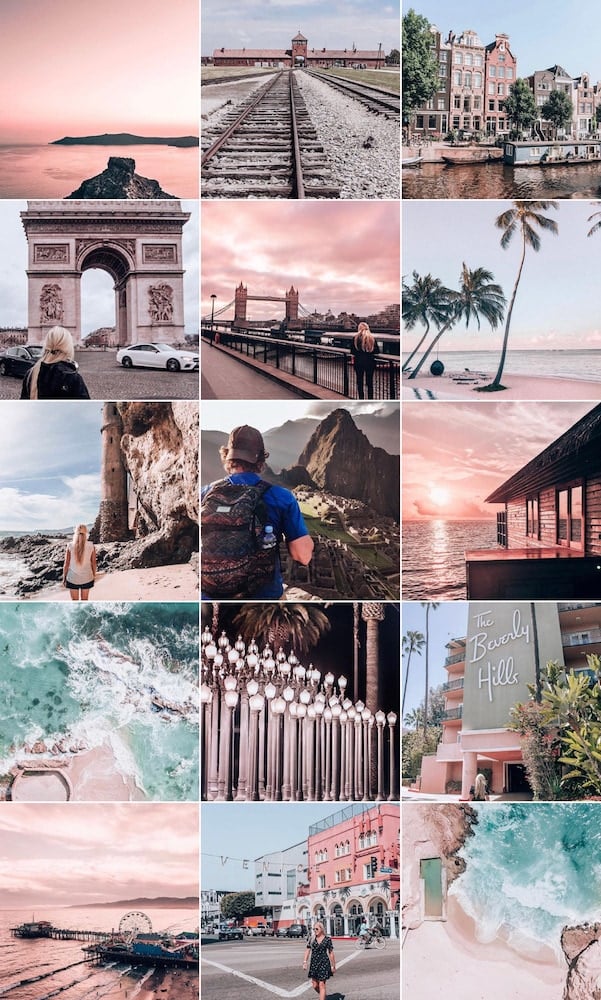
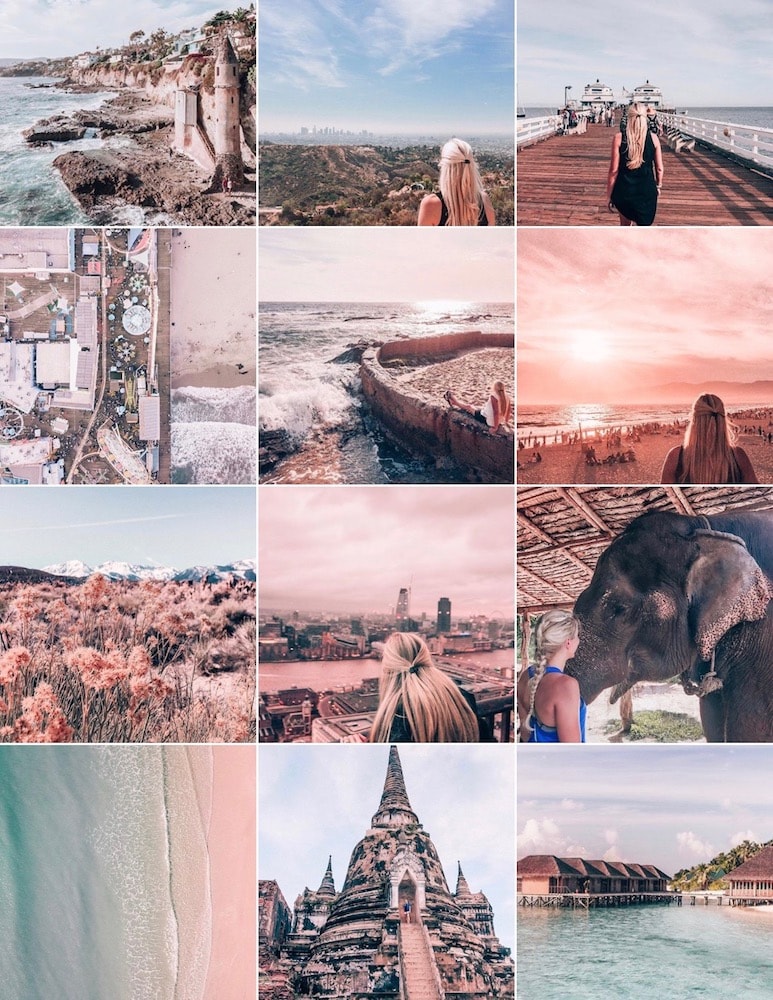
My feed once I started using Preview App:
Building a cohesive Instagram feed
I started using Preview App in February and immediately loved it.
Suddenly I could rearrange photos easily and quickly to see what worked best (more on that later). I also could use the presets and Lightroom to make sure tones worked together and colors didn’t clash.
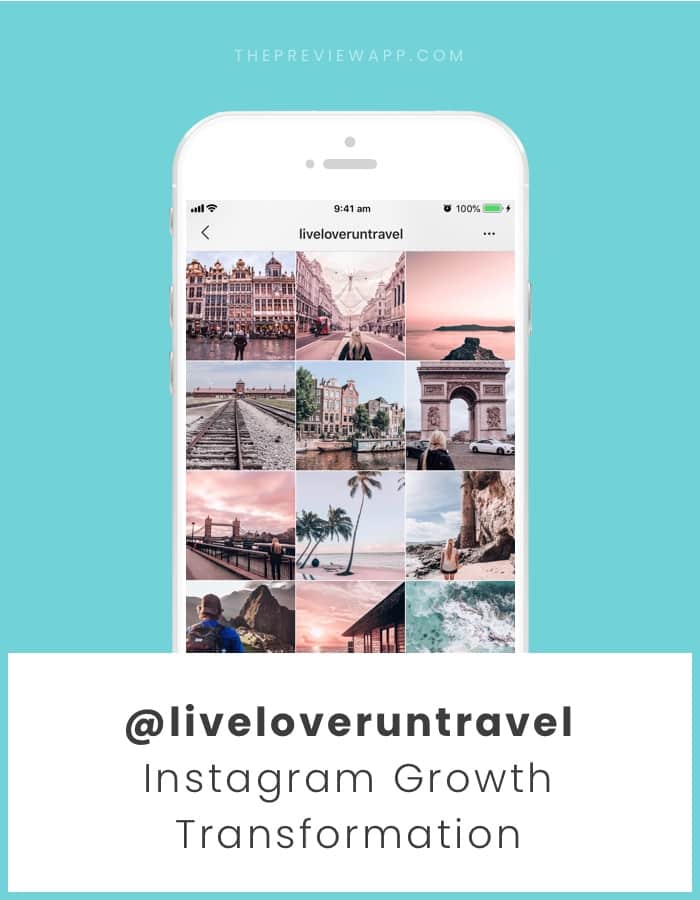
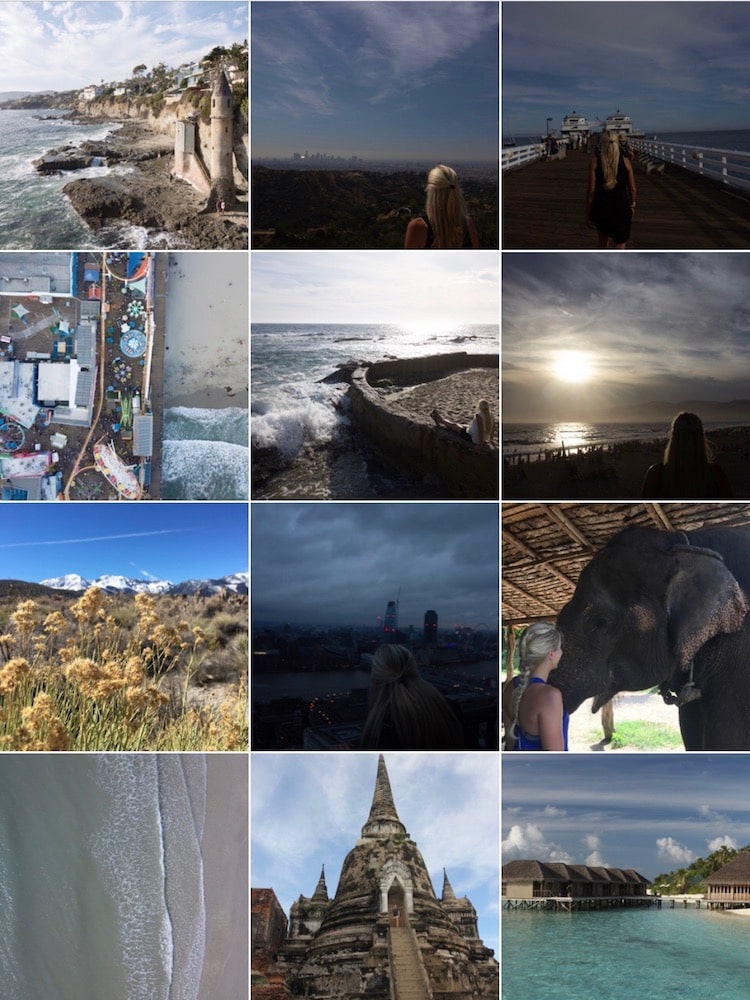
I posted a few photos with pink tones, and within a week or two, I had a pink themed feed. My feed would lead you to believe that I love pink, but I’m actually more of a blue person in real life. However, the pink tones have worked well for me and for my editing style.
Below you can see my recent feed using Preview app, and another feed with different tones. Keeping the same tones flowing through my feed is much easier now:
Results of a cohesive Instagram feed
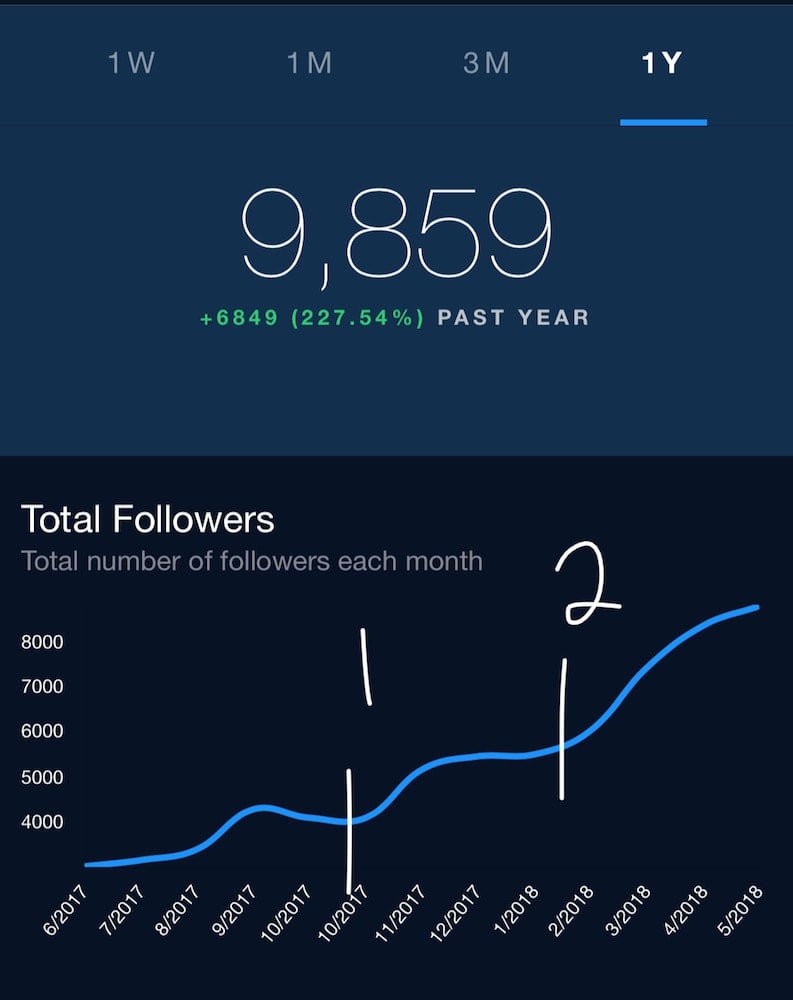
Since building a cohesive feed, my following has increased from 5,500 to almost 10,000.
I started getting noticed for having a pink feed and people started sharing my feed in their stories. This helped get my name in front of more people.
Up until I hit about 9,000 followers, my engagement rate stayed between 12 – 15% per post. My likes increased to 10% engagement on their own most of the time. I started to have anywhere from 150 – 200 comments per post. This was partially due to people liking the look of my photos but also thanks to adding a call to action to my captions and to returning comments. I try very hard to not only reply on my post but to go and like and comment on posts from those who take the time to comment on my posts.
After hitting 9,000 followers, my engagement has decreased slightly to about 9 – 12% per post. I know that typically the bigger the following, the smaller the engagement rate, but I do strive to keep engaging with my tribe because I know that you have to give to receive.
Below, you can see when (1) I started editing photos in Lightroom, and (2) I started using Preview App.
How I plan my feed
In this section, I will tell you exactly what I do.
First, thanks to Preview App I am no longer posting and deleting photos to see what works.
For each post, here are the steps I follow:
- Upload the photos I want to post in Preview (after editing them in Lightroom)
- Drag them down to my recent posts
- Decide on the order for my next few posts (usually I know my next three posts, but sometimes I get behind or get ahead) by using drag and drop to move everything into place
- Arrange the posts so that I can see the three photos together with my current feed and so that I can see just the next photo with my current feed (sometimes I add filler photos from my recent photos that I go back and delete to make it so I can see these arrangements to see the new row of three and my feed plus the next post)
- Check the tones and colors against my current feed
- Revise as needed in Lightroom to get the photos to flow with my feed
- If needed, I put off posting the photo if it will be significantly different than current photos so I have time to built a transition
When I’m looking at my next post (or next few post), the important thing to me is to make sure it stays cohesive. I want it to flow with my feed. For my feed, that means I want to keep some sort of pink tones in there and mix in some shades of blue when possible.
Ideally I stay about three to five posts ahead. But I always have about 15 – 20 photos waiting in case I need some photos for transitions or for days where I may not have had a chance to get ahead on planning.
I typically try to take time on the weekend to plan since I work full-time as a teacher as well. If I have some free time during the week, I make sure I get ahead on posts then. If I get behind because life got busy, I may only be working on my next photo, but I try not to let that happen as it usually means I miss my optimal posting time which is right after the school day ends, so I have to be ready to go.
In addition to planning my feed, I keep a note on my phone with caption ideas that can work with those photos in case I am struggling to come up with ideas.
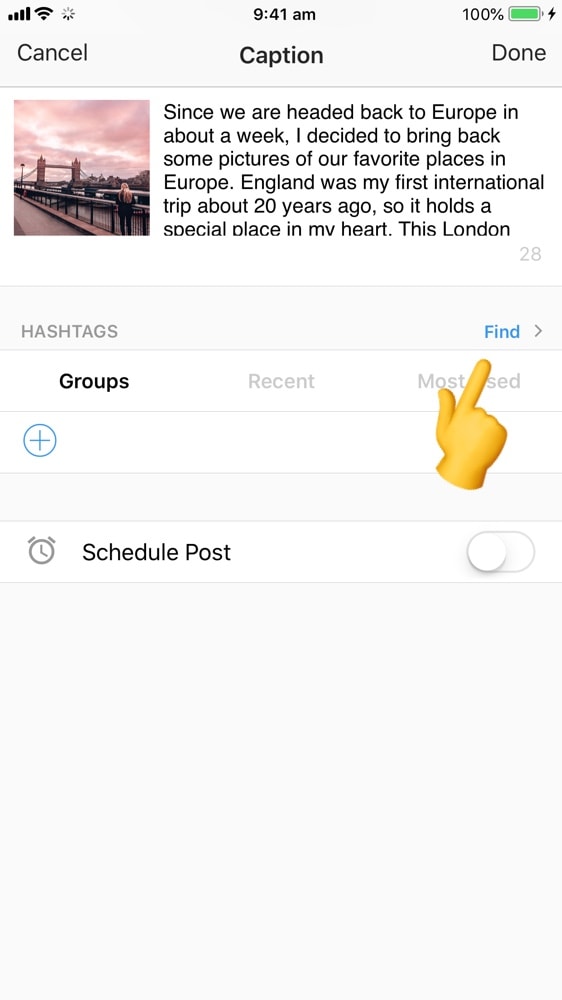
How I use hashtags
I also keep a note with hashtags in groups.
I am in the process of transferring these groups over to Preview. You can save all your hashtag groups in the app and add them in your caption whenever you need them, instead of using a separate app.
I also love the hashtag research tool on Preview for finding new hashtags to use since it’s a good idea to change up hashtags when you can to have new eyes see your photos.
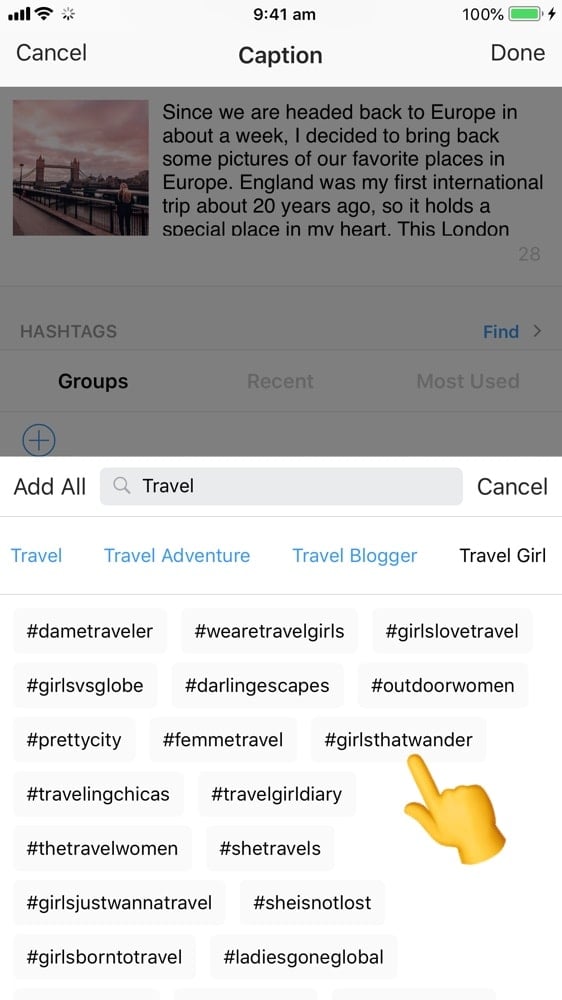
When it comes to hashtags, I usually try to use more specific hashtags or feature hashtags.
I stay away from large hashtags like #travel or #seetheworld. Instead, I usually use a mix of hashtags related to the location and then female travel hashtags if I am in the photo (see travel hashtags here).
I also use a few bigger travel hashtags for feature accounts just in case. I don’t use many of them though because I know it is unlikely my photo will be seen there (read Preview’s hashtag tips here).
I use all 30 hashtags, tag 20 accounts in the photo, and tag the location of my photo every time.
My photos are reposted regularly on feature accounts, and that is usually my goal as it gets my photos in front of more people. I can then go through and interact with people on my shared photos to find people who already like my work but have not seen my account.
That’s it!
Here is my Instagram feed transformation. I hope you enjoyed!
My Instagram is @liveloveruntravel and I share all my travel tips on my blog (41 countries and counting). See you over there!

How do you find 20 feature accounts to tag in your photos? Does it work if you tag the m in your best old photos?
I look at what others with similar photos are tagging. For example, with my travel photos, I usually find some that are location specific (@visitscotland for example), some that are Travel girl ones (@travelgirlsgo for example), and some that are more general travel ones related to the photo (@beautifuldestinations for example). These are usually tied to the hashtags I’m using too. For these I would use #visitscotland, #travelgirlsgo, and #beautifuldestinations in my post as well.
Great post! How about a post on feature accounts? How to find them, how effective are they, etc. Thanks!
yeah agreed. this would be great. especially since my page is mostly outfit inspirations I created http://www.instagram.com/styledbysolita
I usually find them through hashtag searches or looking to see what similar accounts are tagging. I’ve had success doing it that way. Many hashtags are tied to a page, so I use their hashtag and tag them in my account.
Some great ideas here Alexandra. Regarding colour I would suggest a different approach Instead of throwing a tone like pink across everything you can use two or three colours as accents Look at the feed of uber successful Toronto photographer Alen Palandar and you’ll see this in action. https://www.instagram.com/alenpalander/
There’s no need to abandon colours you like! I think if you had pink and blue tones throughout it would be more interesting. Thanks.
Very valuable tips, thank you. You realize that you can turn on a few screws and should, if you do not want to leave the success to chance 🙂